
Gather Your Supplies First
Before beginning any foam sealing project, assembling the correct materials and tools will determine whether your insulation effort succeeds or fails. Start with expanding polyurethane foam sealant, available in low-expansion or high-expansion formulas. Low-expansion foam works best for small cracks and gaps around window frames, electrical outlets, and plumbing penetrations, while high-expansion foam suits larger voids in attics, basements, and rim joists. Purchase at least three to four cans for a typical home project, as foam volume decreases significantly once cured.
You will also need a quality caulking gun if working with gun-grade foam, disposable nitrile gloves to protect your hands from the adhesive properties of uncured foam, safety glasses to shield your eyes from accidental spray, and a respirator mask rated for organic vapors. Columbia’s humid subtropical climate means moisture levels often exceed 60 percent during summer months, which can affect foam curing times and adhesion. Check your local weather forecast and aim for application during moderate humidity days in spring or fall for optimal results.
Additional supplies include a utility knife with fresh blades for trimming cured foam, painter’s tape to protect surfaces adjacent to application areas, and drop cloths or plastic sheeting to cover floors and furnishings. A flashlight or headlamp proves invaluable when inspecting dark crawl spaces and attic corners. Keep mineral spirits or acetone nearby for immediate cleanup of uncured foam on tools or skin. Finally, consider investing in a foam gun applicator if tackling multiple rooms or a whole-house project, as the precision tip and reusable design offer superior control compared to disposable straw applicators. If the scope of your project extends beyond a few problem areas, consulting with professional foam sealing services may provide more efficient coverage and long-term performance.
Prepare Surfaces Before Application
Proper surface preparation directly impacts how well foam adheres and seals gaps in your home’s building envelope. Begin by thoroughly cleaning all areas where foam will be applied. Remove dust, cobwebs, loose paint, and debris using a stiff brush or vacuum with a crevice attachment. Pay particular attention to window and door frames, foundation sills, and attic penetrations, as these areas accumulate the most contamination over time. Any moisture, oil, or dirt left on surfaces will create a barrier between the foam and the substrate, leading to poor adhesion and eventual air leakage.
Once surfaces are clean, inspect for existing damaged or deteriorating caulk and weatherstripping. Remove old materials completely using a putty knife or scraper, as foam will not bond effectively over silicone caulk or rubber. Columbia’s older homes, particularly those built before 1980, often feature settling foundations and wood framing that has shifted over decades, creating irregular gaps that require special attention. Measure gap widths carefully: openings larger than one inch may need foam backer rod inserted first to provide support and reduce foam consumption.
Check substrate moisture levels, especially in basements and crawl spaces where Columbia’s seasonal rainfall can create persistently damp conditions. Foam requires a slightly moist surface for optimal curing but will not adhere to soaking wet materials. Wipe away standing water and allow surfaces to air dry until just barely damp to the touch. Remove any loose insulation, nesting materials, or pest debris from wall cavities. Mark all electrical wires and plumbing lines with bright tape to avoid accidental coverage, as foam expands significantly and can hide these critical systems. If you encounter extensive water damage, mold growth, or structural concerns during preparation, professional assessment becomes necessary before proceeding with any sealing work.
Apply Foam With Controlled Precision
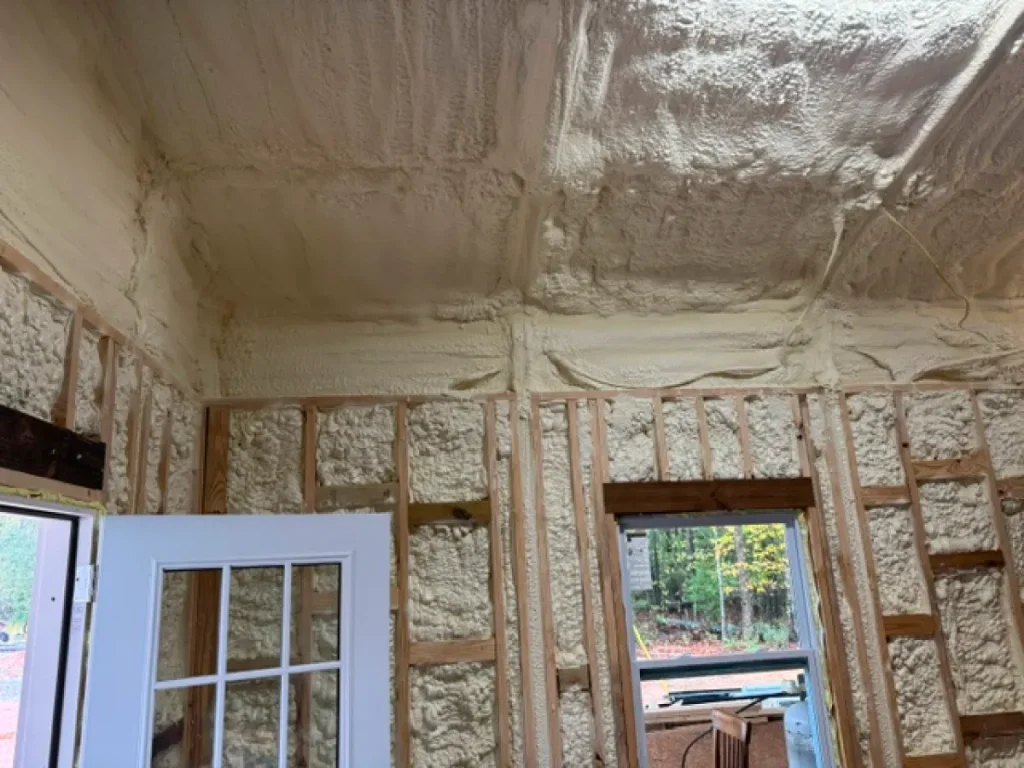
The application phase requires steady hands and deliberate technique to achieve professional-looking results. Shake foam canisters vigorously for at least 60 seconds before use, then test spray into a trash bag to verify consistent flow and pressure. Hold the can upside down during application to maintain proper propellant pressure, keeping the tip approximately one inch from the surface. Begin with the deepest gaps and work toward shallower cracks, applying foam in a continuous bead that fills only 50 to 60 percent of the void. This conservative approach accounts for significant expansion that occurs within the first hour after application.
Move the applicator at a steady pace, neither too fast nor too slow, to create uniform coverage without gaps or excessive buildup. For vertical applications, work from bottom to top to prevent uncured foam from sagging or dripping. When sealing around window and door frames, apply foam in the gap between the rough opening and the frame itself, staying at least one inch back from the interior edge to allow room for expansion without bowing the frame. Columbia homeowners often discover that older single-pane windows and doorways contain significantly larger gaps than newer construction, sometimes requiring two or three passes with appropriate curing time between layers.
Temperature significantly affects foam performance. Ideal application occurs when both air and surface temperatures fall between 60 and 80 degrees Fahrenheit. Columbia’s summer heat often pushes temperatures well above this range, causing foam to cure too rapidly and become brittle, while winter mornings may drop below the minimum threshold, resulting in poor expansion and adhesion. Early morning or late evening application during moderate seasons provides the best working conditions. Wear your respirator mask throughout application, as chemical vapors concentrate quickly in enclosed spaces like attics and crawl spaces. If you feel lightheaded or experience respiratory irritation, exit immediately and ventilate the area. For whole-house applications or hard-to-reach locations such as cathedral ceilings and complex rim joist assemblies, homeowners often find that professional installation delivers more consistent results with proper safety protocols already in place.
Avoid These Critical Mistakes
Even experienced DIY enthusiasts make predictable errors when working with expanding foam sealant. The most common mistake involves overfilling gaps, which leads to excessive expansion that can bow window frames, crack drywall, or push door jambs out of alignment. Remember that foam typically expands to two or three times its original volume, with some high-expansion formulas reaching even greater ratios. Apply conservatively during your first pass, then return to add more foam only after the initial application has fully cured, which usually requires 24 hours in moderate conditions.
Another frequent error occurs when homeowners apply foam to wet or frozen surfaces. While foam needs slight moisture to cure properly through a chemical reaction with water vapor, excessive wetness prevents proper adhesion and causes the foam to slough off once dried. Similarly, applying foam when temperatures drop below 40 degrees Fahrenheit results in incomplete expansion and poor bonding. Columbia experiences occasional hard freezes during January and February that can catch inexperienced applicators by surprise, particularly in unheated attics and crawl spaces where temperatures lag behind outdoor warming trends.
Failure to protect surrounding surfaces ranks as the third most costly mistake. Uncured foam bonds tenaciously to skin, clothing, finished surfaces, and virtually everything it contacts. Once cured, removal requires scraping, sanding, or chemical solvents that may damage underlying materials. Always apply painter’s tape and drop cloths before beginning work. Do not attempt to wipe away uncured foam with rags or paper towels, as this spreads the adhesive further. Instead, allow accidental drips to cure completely, then trim away excess with a sharp utility knife.
Finally, many DIY practitioners neglect proper ventilation and personal protective equipment. Foam releases isocyanates and volatile organic compounds during application and curing, which can cause respiratory irritation, sensitization, and long-term health effects with repeated exposure. Always wear a properly fitted respirator, work in well-ventilated areas, and exit immediately if you experience dizziness, nausea, or breathing difficulty. Homeowners undertaking large-scale projects involving multiple rooms or continuous application over several days should carefully weigh the cumulative exposure risks against the benefits of hiring trained professionals who maintain appropriate safety equipment and ventilation systems.
Inspect and Maintain Your Work
After foam has fully cured for 24 to 48 hours, conduct a thorough inspection to verify complete coverage and proper sealing. Use your flashlight to examine all treated areas from multiple angles, looking for gaps, voids, or spots where foam failed to expand adequately. Pay special attention to complex joints, corners, and penetrations where the applicator tip may not have delivered foam into the deepest recesses. Small missed areas allow significant air infiltration despite surrounding sealed sections, so address any deficiencies immediately with additional foam application.
Trim excess foam flush with surrounding surfaces using a sharp utility knife or a fine-tooth saw. Work carefully to avoid gouging wood framing or drywall. Foam takes paint and texture coatings well once trimmed, making it suitable for visible areas where appearance matters. In unfinished spaces such as attics and basements, leaving the foam exposed poses no functional problem, though you may choose to paint it for a cleaner aesthetic. Run your hand along sealed areas to feel for air movement, which indicates incomplete seals. Columbia’s temperature swings between summer and winter create noticeable drafts through even small openings, making tactile inspection particularly effective during seasonal transitions.
Establish a maintenance schedule to monitor your foam sealing work over time. Inspect sealed areas annually, particularly after severe weather events that can shift building components and create new gaps. Look for cracks in the foam itself, separation from substrates, or pest damage, as rodents and insects occasionally chew through cured foam to access wall cavities. Address any deterioration promptly to maintain your home’s thermal envelope integrity. Check the energy efficiency impact of your sealing work by comparing utility bills from the same months in previous years. Most homeowners notice a 10 to 20 percent reduction in heating and cooling costs after properly sealing major air leakage points.
Document your work with photographs and notes about which areas you sealed, the products you used, and the date of application. This record proves valuable for future renovation projects, home sales, and insurance documentation. If your inspection reveals more extensive air sealing needs than initially anticipated, or if you discover structural issues, moisture problems, or pest infestations during your work, consulting with professionals who specialize in building science and insulation becomes the prudent next step to protect your investment and ensure long-term performance.